The Transformation Begins
Hello there! I’m Alan Carter Adams, your friendly neighborhood Appliance Ace, here to guide you through the journey of transforming your drywall projects with the Electric Drywall Sander equipped with an impressive 99% dust absorption feature. With a background in Mechanical Engineering, I’ve spent decades understanding the nuances of tools like this and their impact on the quality of work and efficiency.
Why Choose a Powerful Electric Drywall Sander?
For any DIY enthusiast or professional contractor, the Electric Drywall Sander is not just a tool; it’s an essential part of achieving that flawless finish. This sander is designed to make sanding drywall joints, ceilings, and other surfaces a breeze. But what sets this model apart?
Key Features to Consider
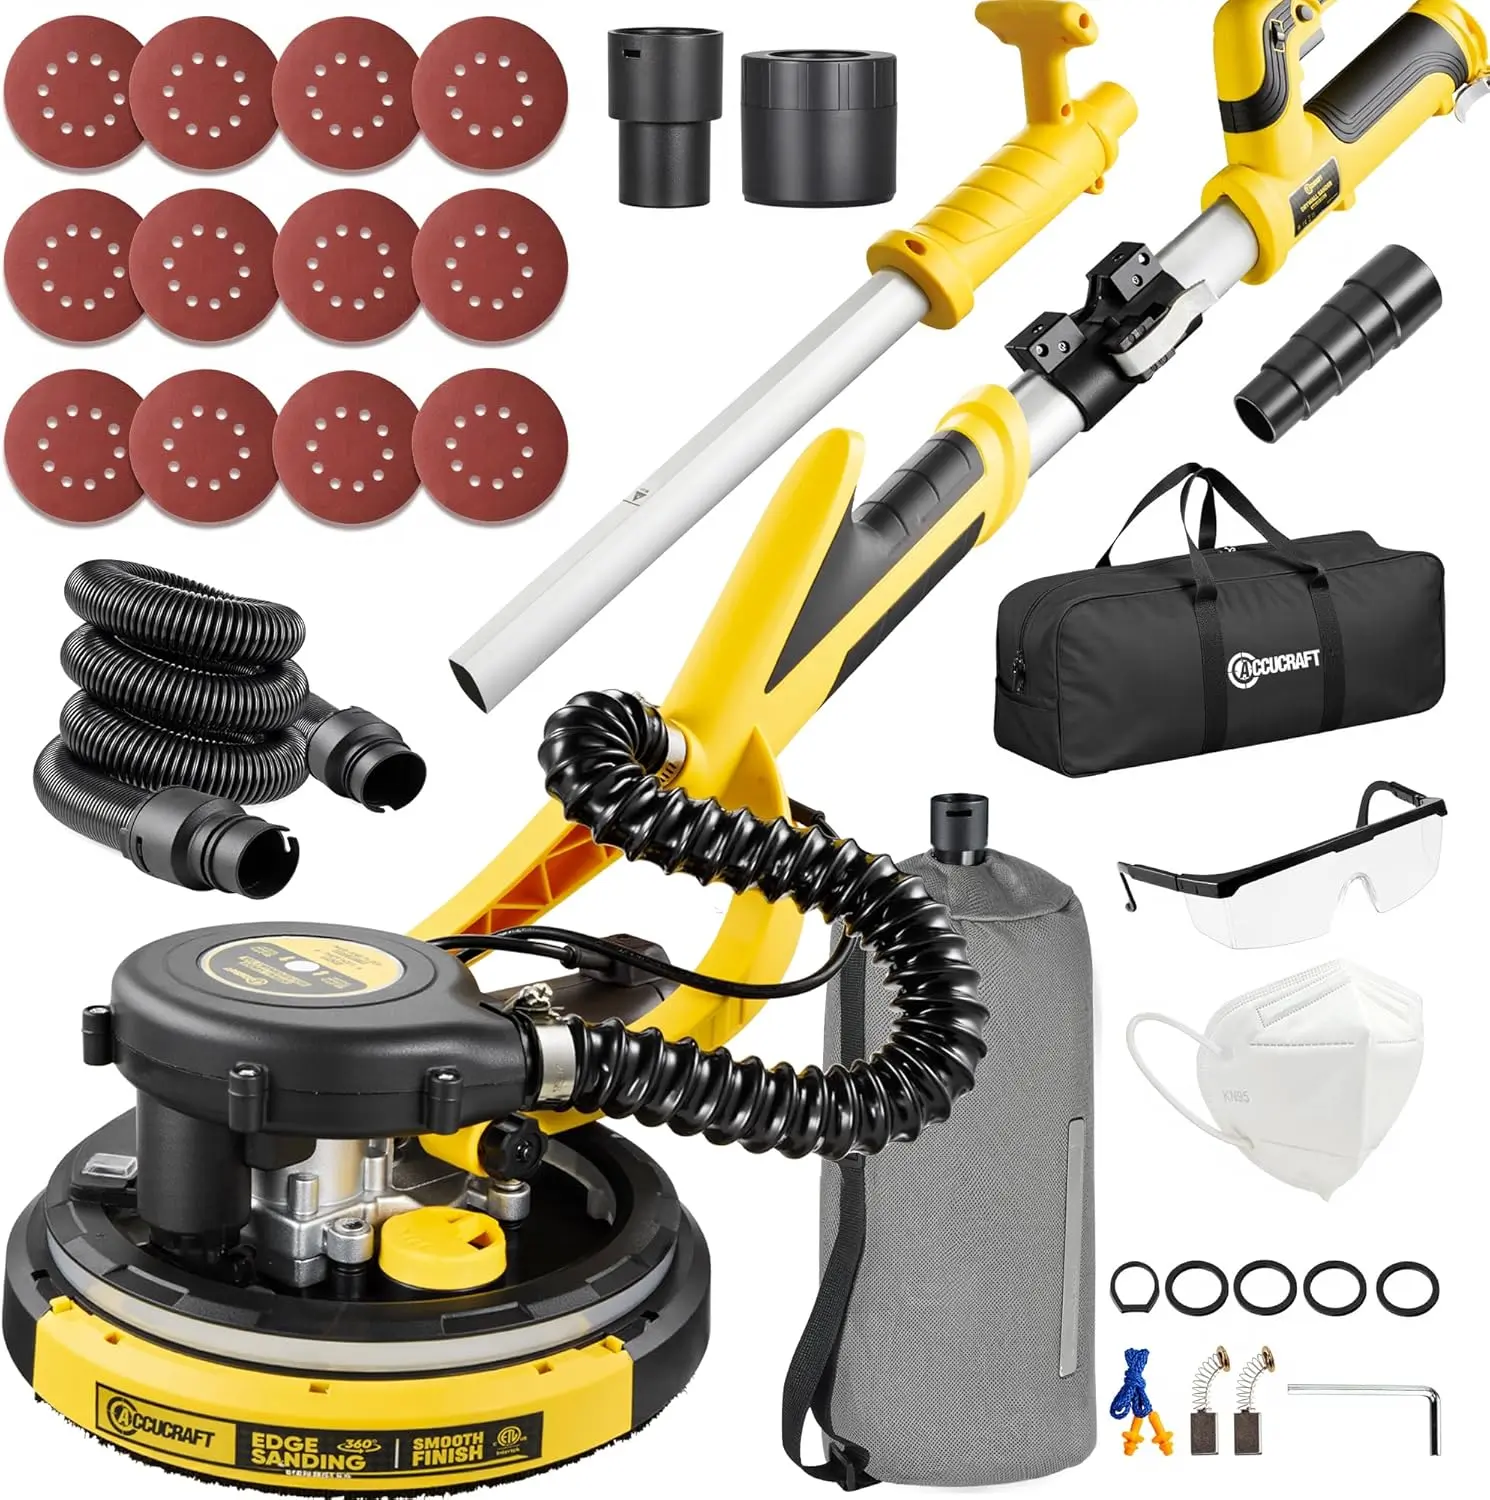
- Integrated Vacuum System: Unlike traditional sanders that leave a dust storm in their wake, this sander boasts an integrated vacuum system that captures an incredible 99% of the dust. This feature reduces cleanup time and keeps your workspace healthier, which should resonate with anyone who values efficiency and cleanliness in their projects.
- Variable Speed Settings: It offers seven variable speeds ranging from 900 to 1800 RPM. This adjustability means you can customize the sanding experience based on your project specifics—whether you’re tackling a delicate surface or a tough, textured area.
- Extended Reach: With a convenient 26-foot power cord, this sander allows you to maneuver freely around your space without constantly searching for outlets. This feature transforms your workflow, especially in large rooms or ceilings, making it practical for various locations.
- Built-In LED Light: And let’s not overlook the built-in LED light. For those tricky dark corners or tight spots, this powerful light illuminates your workspace, ensuring you don’t miss a single imperfection that needs attention.
Real-World Application: Drywall Finishing Mastery
Now that we’ve established why this tool is a game-changer, let’s walk through how you can effectively use it in a real-world scenario. Imagine you’re preparing a room for painting. The drywall is up, but the surface is rough and riddled with imperfections from the installation process. You need precision; that’s where our powerful Electric Drywall Sander comes in.
Step 1: Preparation
Before starting, ensure your workspace is clear. Put on safety gear (mask and goggles) since you’ll be generating some dust, even with the vacuum. Plug in your sander using the 26-foot cord and adjust the speed according to the severity of the surface imperfections. For an initial pass on rough patches, a higher speed is recommended.
Step 2: Sanding
Begin with a steady hand, moving the sander across the surface. Thanks to its variable speed settings, you’ll feel in control. The integrated vacuum system will kick in, absorbing the majority of the dust as you go. This means less time cleaning up and more time getting the job done.
Step 3: Finishing Touches
Once your sanding is complete, use the built-in LED light to inspect the areas you’ve worked on. Check for any lingering rough spots. If found, you can easily adjust the speed and revisit those areas for a flawless finish.
Wrap-Up
In summary, the Powerful Electric Drywall Sander with an integrated vacuum system is a must-have for anyone serious about achieving smooth, professional finishes. With its user-friendly design, variable speeds, and enhanced dust absorption capabilities, it’s equipped to handle a range of tasks with ease.
Final Thoughts from the Appliance Ace
With my extensive experience in appliance repair and maintenance, I can confidently say that investing in quality tools like this sander elevates your craftsmanship. Whether you’re working on a simple room upgrade or a complete renovation, the reliability and performance of an Electric Drywall Sander will certainly make it a worthwhile addition to your toolkit.
Explore your options and remember: every great finish starts with the right tools! Happy sanding!
Alan Carter Adams, Appliance Ace
Leave a Reply