In the world of off-the-grid living and survival, having an efficient home cooling system can make all the difference when the summer heat bears down. As a curious kid, my passion for self-sufficiency led me to learn about various components of home systems, such as the unsung hero of air conditioning—the condenser fan motor. Learning the ins and outs of a Condenser Fan Motor Replacement is not just a DIY skill; it’s a pivotal part of maintaining a shelter that is both cool in summer and resilient all year. Welcome to my in-depth guide on how to replace your condenser fan motor, specifically focusing on the 1/10 HP, 1100 RPM models designed to enhance your air conditioning system.
Understanding the Condenser Fan Motor
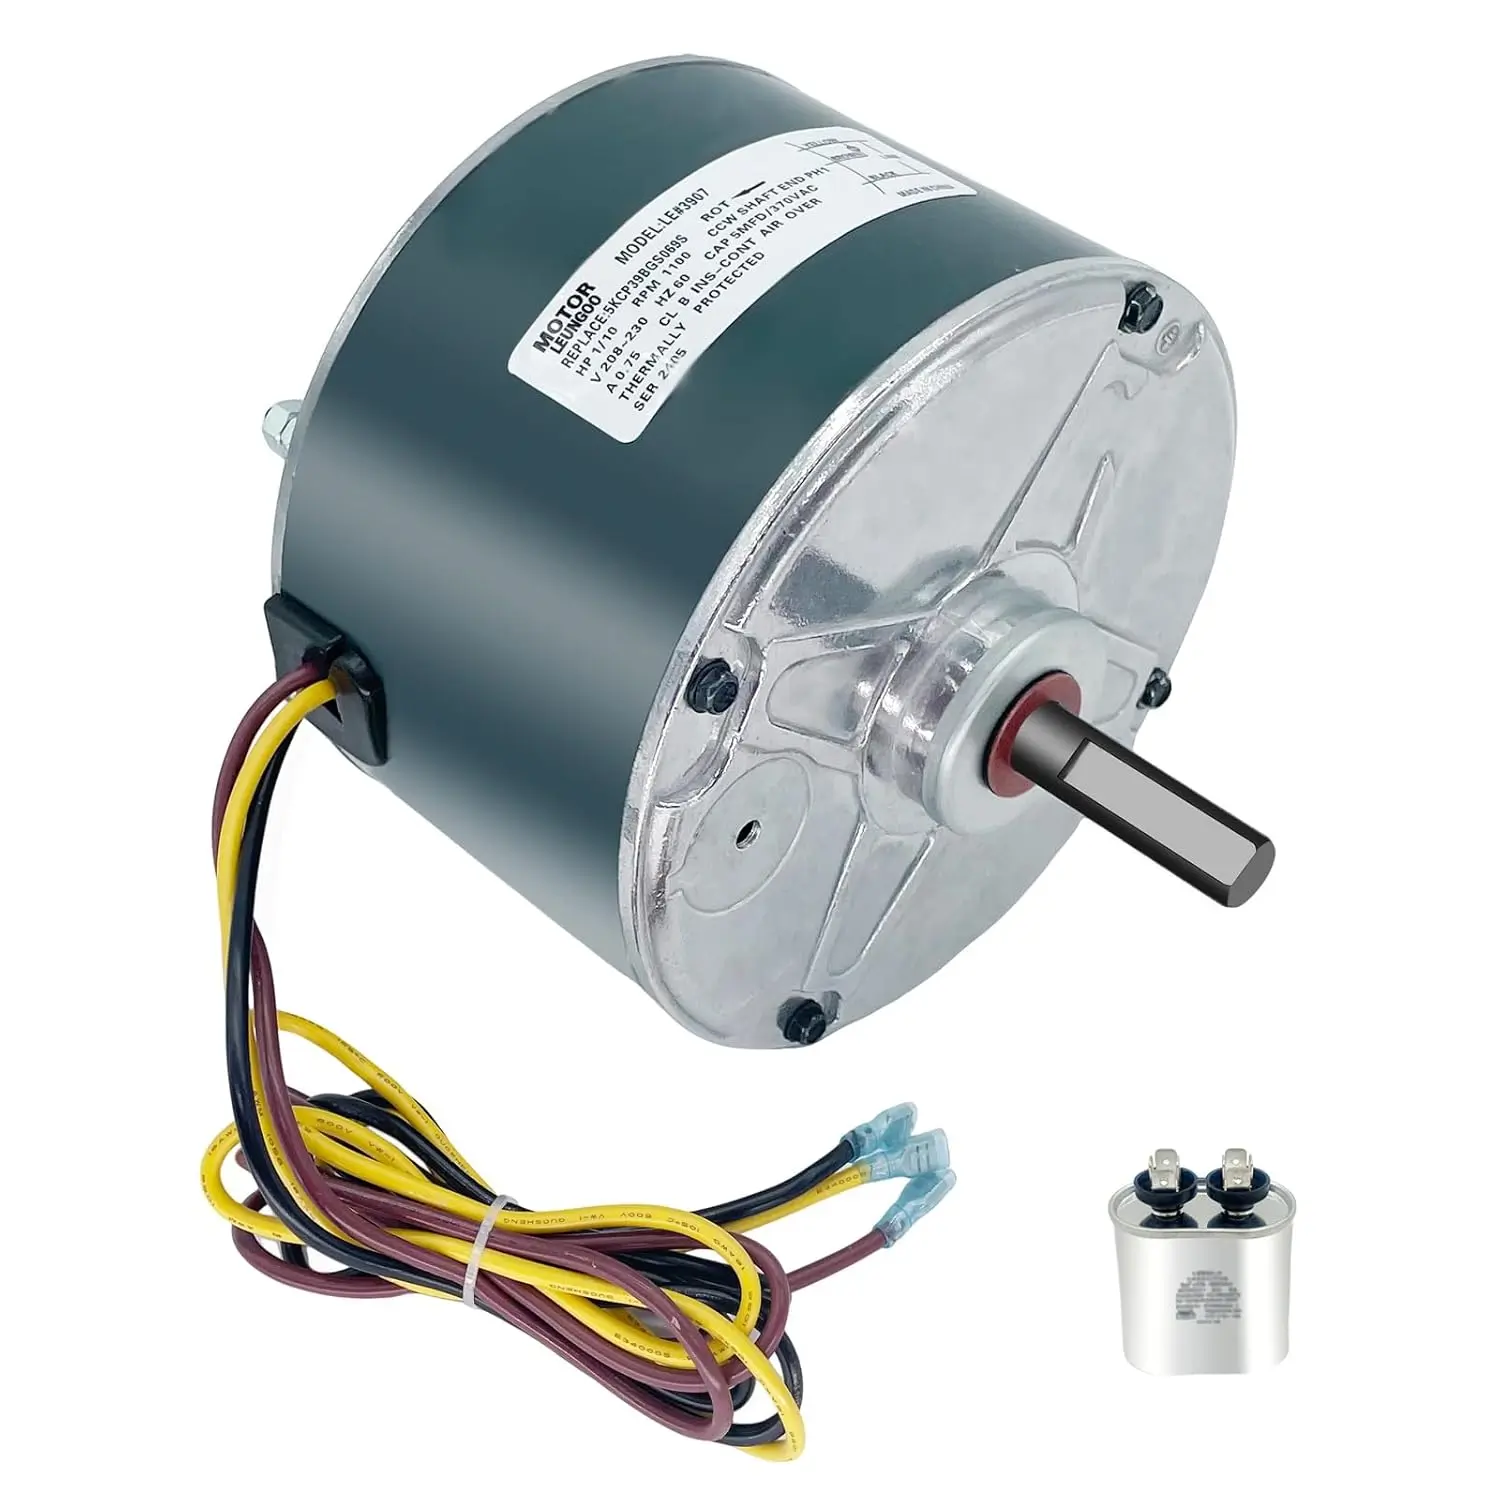
Before plunging into the replacement process, it’s essential to grasp what a condenser fan motor does. Located outside your home, this motor cools the refrigerant flowing through the condenser coils, ensuring your air conditioning system operates efficiently. For systems compatible with carriers, or similar brands, the right motor is crucial. The high-efficiency Condenser Fan Motor Replacement not only cools your home but also extends the lifespan of your AC unit.
Step-by-Step Guide to Replacing Your Condenser Fan Motor
Step 1: Gather Your Tools and Materials
Before embarking on this project, collect all the necessary tools:
- Screwdrivers (Phillips and flathead)
- Pliers
- Multimeter
- Replacement motor (1/10 HP, 1100 RPM)
- Wire connectors
- Electrical tape
- Safety goggles
- Gloves
Step 2: Safety First
As a master in wilderness skills, I know the value of safety. Always turn off the power to your air conditioning unit at the breaker box before starting any work. This precaution will protect you from electrical shocks and ensure a smooth installation process.
Step 3: Remove the Old Fan Motor
With the safety gear on and power off, carefully remove the access panel of your condenser unit. Use your screwdriver to unscrew the panel. Then locate the fan motor. Take a moment to observe how the old motor is connected: note the wiring configuration as it will guide you during installation. Disconnect the wires from the old fan motor, remembering which wires are connected to which terminals.
Next, remove any mounting bolts or screws holding the old motor in place. Once free, lift the motor out of the unit.
Step 4: Install the New Condenser Fan Motor
Now it’s time for the exciting part—installing your new high-efficiency Condenser Fan Motor Replacement! Position the new motor in place and secure it with the bolts or screws you previously removed. This motor operates at 208-230V, 60HZ, 48 Frame specifications, engineered for durability and reliability, meaning it’s built to withstand a fair amount of usage.
Reconnect the wiring. Double-check your notes or photographs from when you disconnected the old motor, ensuring you place each wire in the correct terminal. Most motors also come with a built-in capacitor, which reduces maintenance needs—another critical factor in your quest for preparedness.
Step 5: Test the Installation
Once everything is connected, it’s essential to test your work. Turn the power back on at the breaker box and set your thermostat to a cooling setting. Listen closely as the motor starts up and ensure the fan spins smoothly without noise. A properly functioning unit should achieve an efficient 1100 RPM.
Step 6: Monitor and Maintain
With the new motor installed, it’s important to stay vigilant. Regular maintenance checks can prolong the life of your AC unit and the new condenser fan motor. Clean the area around the unit to improve airflow, and perform service checks as needed. Keeping everything in top shape is paramount in an uncertain future.
Conclusion
Completing a Condenser Fan Motor Replacement not only enhances the efficiency of your air conditioning system but also reinforces your preparedness mindset. The high-efficiency condensing fan motor, designed to fit Carrier and other compatible models, operates at optimal performance, keeping your home cool and comfortable through the sweltering summer months. Remember to embrace self-sufficiency and empowerment in every do-it-yourself project. As Rusty Vanguard, my journey is built on continuous learning and readiness—may yours be too!
Whether you’re a lone wolf or part of a collaborative community, mastering skills like this reinforces the strength and resilience needed in today’s world.
In the grand scheme of survival and preparedness, replacing your condenser fan motor is a small yet significant step towards maintaining a sustainable, functioning home.
Leave a Reply