Introduction to RV Air Conditioner Motor Replacement
Hello, I’m Jerry Fitzgerington. As someone who has always had an analytical mind and a penchant for technology, I can say that ensuring an optimal cooling system for your RV is not just about comfort—it’s a matter of efficiency and performance. When it comes to RV Air Conditioner Motor Replacement, making the right choice can significantly impact your travel experiences.
In this guide, I’ll walk you through the steps of replacing your RV’s air conditioner motor, using high-performance options that enhance your camping adventures. Whether you’re a tech-savvy individual like me or someone venturing into their first DIY project, I aim to present the entire process clearly and precisely.
Understanding the Importance of the RV Air Conditioner
Prior to diving into the replacement process, it’s crucial to appreciate why your RV’s air conditioner matters. During the sweltering summer months, having efficient cooling is not just a luxury, but a necessity. Over time, however, motors can wear out due to prolonged use or rugged travel conditions, resulting in poor performance or total failure.
Identify the Right Replacement Motor
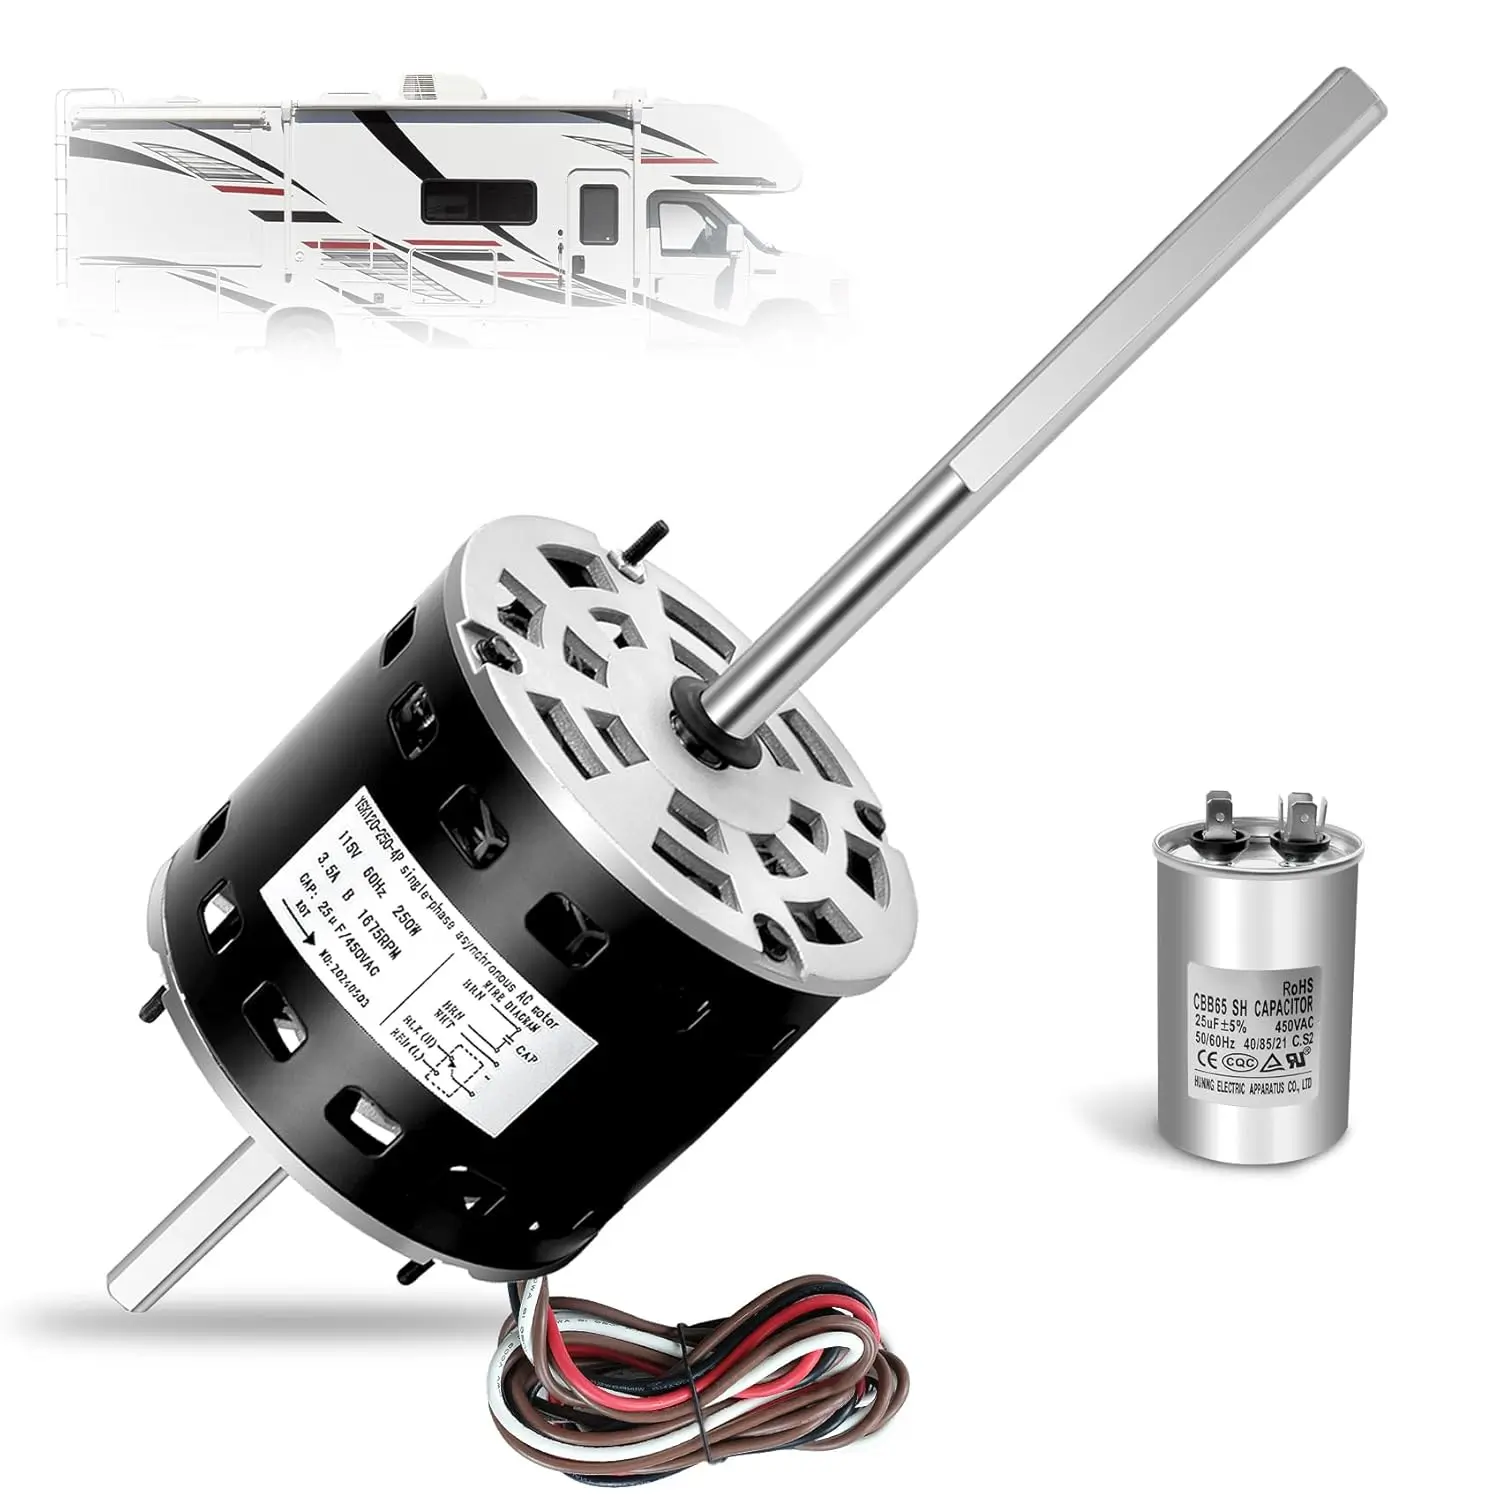
When prepared for RV Air Conditioner Motor Replacement, the first step is choosing the right product. I recommend considering our high-performance air conditioner motor, which is compatible with various Coleman Mach models.
Key Features of the High-Performance Motor
- Power Output: With a 1/3 HP output, this motor ensures you’ll have plenty of cooling power to beat the heat.
- Dual Speeds: Featuring dual speeds of 1675/1080 RPM allows you to adjust the cooling based on your preference and needs.
- Short Shaft Design: This thoughtful design allows for straightforward installation, which is particularly gratifying for someone like me who appreciates efficiency in execution.
- Capacitor: The unit comes with a 25µF/450V capacitor, enhancing its operational capabilities while ensuring a reliable performance.
It caters specifically to those who own Coleman MACH 3, MACH 3 Plus, MACH 15, or the 6000/8000 Series A/C units—allensuring seamless compatibility. Moreover, the quiet operation will allow you to fully enjoy the peaceful ambiance outside during your travels.
Tools and Preparation Needed
Before kicking off the replacement, ensure you have the following tools ready:
- Screwdrivers (both Phillips and flathead)
- A socket set
- Pliers
- Replacement motor
- Safety goggles and gloves
Next, make sure to safely disconnect the power to the air conditioning unit. Ignoring this step could lead to malfunctions or injuries—a point that even the most seasoned engineers cannot overlook.
Step-by-Step Guide to Motor Replacement
Step 1: Remove the Old Motor
- Access the A/C Unit: Remove the cover of your A/C unit to access the internal components.
- Disconnect the Wiring: Carefully note how the wiring is set up before disconnecting the old motor. I recommend taking a picture for reference.
- Unscrew the Motor: Use your socket set to unscrew and gently remove the old motor from its housing.
Step 2: Install the New Motor
- Position the New Motor: Align the new high-performance motor into the same position as the old one, ensuring it fits snugly in place.
- Reconnect the Wiring: Refer to the earlier picture to reconnect the wiring accurately. Ensuring solid connections is vital for efficient operation.
- Secure the Motor: Once connected, screw the new motor into place firmly to avoid any movement during operation.
Step 3: Final Checks and Cover
- Test Operation: Before reinstalling the cover, turn the system back on to ensure the new motor operates correctly.
- Close the A/C Unit: If all appears in order, carefully place the cover back over the A/C unit, ensuring no tools are left behind.
Post-Installation Considerations
After completing your RV Air Conditioner Motor Replacement, take the time to monitor the performance of your newly installed motor. Enjoy the quiet, efficient cooling that ensures your RV remains a comfortable retreat, even on the hottest days.
As a detail-oriented individual, I understand the importance of keeping track of your air conditioning’s performance over time. Regular maintenance checks can help catch any issues before they escalate, preserving the longevity of your motor.
Conclusion
RV Air Conditioner Motor Replacement doesn’t have to be an overwhelming task. With careful attention to detail, the right tools, and a high-performance motor, you can ensure your RV remains cool and comfortable throughout your travels. Remember, achieving efficiency starts with a quality product and an understanding of the installation process. This way, your adventures can be more enjoyable, leaving you to focus on creating those cherished memories on the road.
Stay cool, and happy travels!
Jerry Fitzgerald
Leave a Reply